As a reminder, a CI/CD pipeline (or Continuous Integration/Continuous Deployment pipeline) is a series of actions to be performed in order to consistently and reliably distribute a new version of a software.
In this article, we will see how to set up a minimalistic CI/CD pipeline (automatically triggering builds and deployments upon push events to a git repository) that is self-hosted and can be adapted according to your needs.
Prerequisites
We will need:
- A build server that we will name buildsrv:
- Running Linux
- Accessible via SSH
- With make and git tools
- A git forge hosting the sources of our application. We will use GitHub here, but any other forge capable of calling webhooks upon receiving push events on its repositories will also do the job.
- An instance of Ctfreak with an administrator account (the Free Edition will suffice). We will use https://demo.ctfreak.com here.
The sources
The sources of our application can be summarized in this Makefile:
build:
	@echo "Build my awesome app"
deploy: build
	@echo "Deploy my awesome app"
You can find them in this git repository, with the master branch corresponding to the latest deployed version and the dev branch to the version currently under development.
Objectives
Let’s review the objectives to be achieved by setting up our CI/CD pipeline:
- For the Continuous Integration part:
- Compile the sources (via the
makecommand) every time a developer pushes to the dev branch. - Receive a notification in case of failure.
- Compile the sources (via the
- For the Continuous Deployment part:
- Compile the sources and deploy (via the
make deploycommand) every time a developer pushes to the master branch. - Receive a notification in case of success or failure.
- Compile the sources and deploy (via the
To do this, Ctfreak will act as a gateway between the git forge and the build server.
That is, every time a push is received by the forge:
- It will call a webhook defined in Ctfreak.
- Ctfreak will then connect via SSH to the build server to execute the appropriate
makecommand, then send a notification.
Build server configuration
Connect to your build server and run the following commands:
ctfreakdemo@buildsrv:~$ git clone https://github.com/jypsoftware/myawesomeapp.git myawesomeapp.master
> Cloning into 'myawesomeapp.master'...
> remote: Enumerating objects: 15, done.
> remote: Counting objects: 100% (15/15), done.
> remote: Compressing objects: 100% (13/13), done.
> remote: Total 15 (delta 2), reused 6 (delta 1), pack-reused 0
> Receiving objects: 100% (15/15), 14.38 KiB | 3.59 MiB/s, done.
> Resolving deltas: 100% (2/2), done.

ctfreakdemo@buildsrv:~$ git clone https://github.com/jypsoftware/myawesomeapp.git myawesomeapp.dev
> Cloning into 'myawesomeapp.dev'...
> remote: Enumerating objects: 15, done.
> remote: Counting objects: 100% (15/15), done.
> remote: Compressing objects: 100% (13/13), done.
> remote: Total 15 (delta 2), reused 6 (delta 1), pack-reused 0
> Receiving objects: 100% (15/15), 14.38 KiB | 7.19 MiB/s, done.
> Resolving deltas: 100% (2/2), done.

ctfreakdemo@buildsrv:~$ cd myawesomeapp.dev

ctfreakdemo@buildsrv:~/myawesomeapp.dev$ git checkout dev
> Branch 'dev' set up to track remote branch 'dev' from 'origin'.
> Switched to a new branch 'dev'
As you can see, we have cloned the git repo 2 times (1 per branch), which will allow us to avoid potential conflicts if the builds of the master and dev branches were to run concurrently.
Ctfreak Configuration
Log in to your Ctfreak instance with an admin account.
Adding the build server
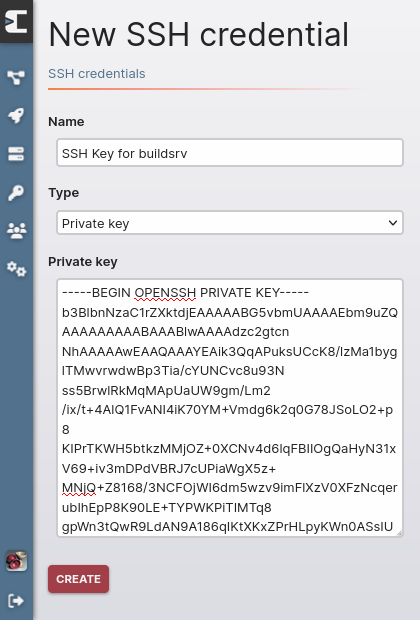
Start by adding the SSH key to connect to the build server via SSH Credential → New SSH Credential:
Then add the server itself via Nodes → Internal Nodes → New node:
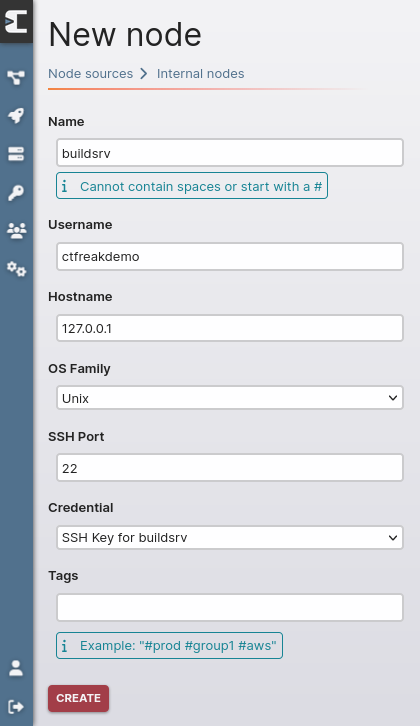
Make sure that the SSH Key for buildsrv key is selected as the Credential (Ctfreak will use it to connect to the server), then validate to create the buildsrv node.
Creating the CI/CD project
We are going to create a dedicated project to gather all the tasks related to our CI/CD pipeline.
Go to Projects → New Project
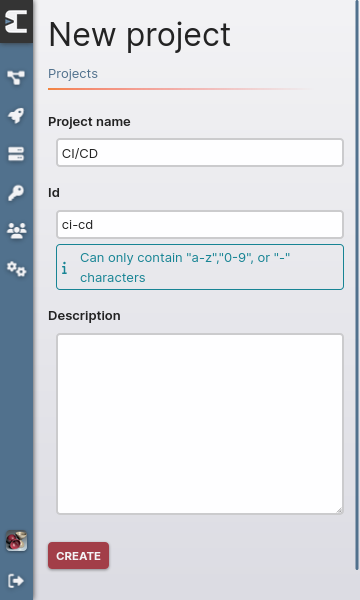
Validate to create the project.
Adding a notifier
Go to Projects → CI/CD → Notifiers → New notifier
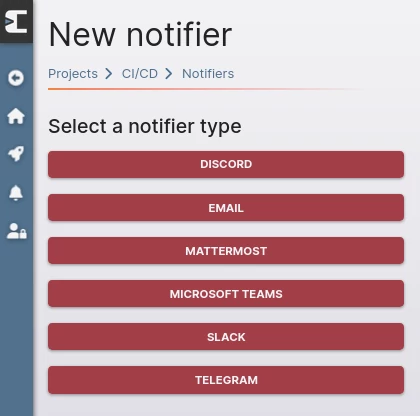
Choose Discord as the notifier type (for example).
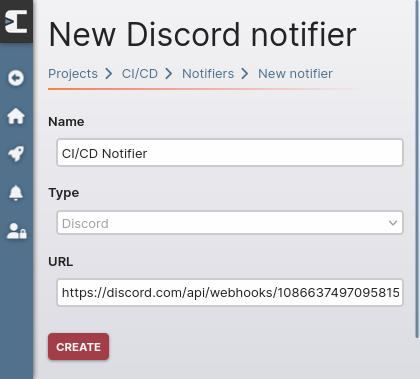
Specify the discord webhook URL to call and validate.
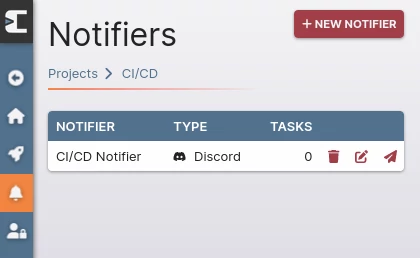
A test notification can be sent by clicking on the send button (the one shaped like a paper airplane).
Creating the build task
Go to Projects → CI/CD → New task
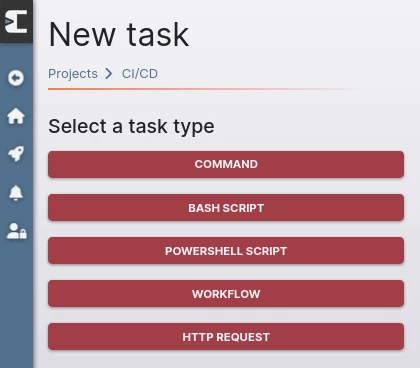
Choose Bash Script as the task type.
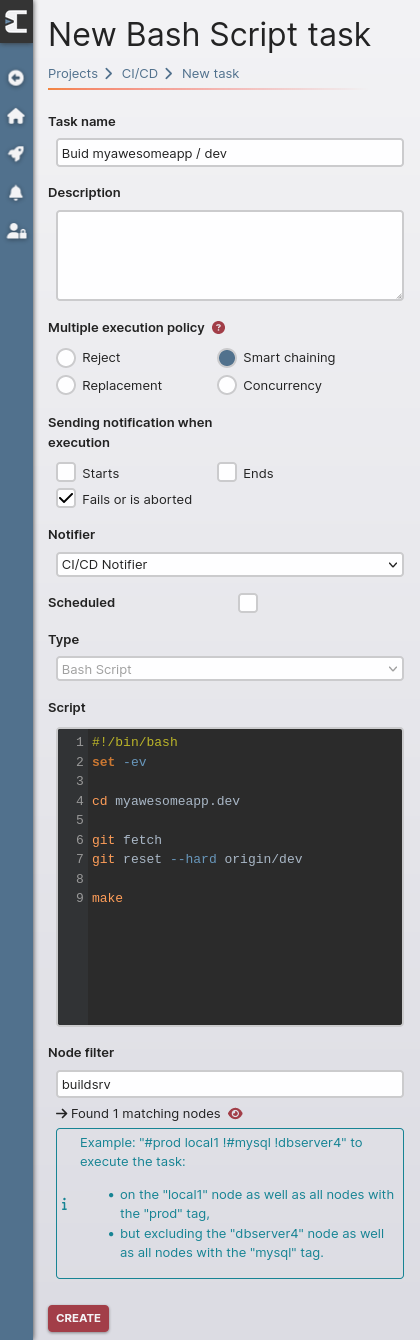
As you may have guessed, this task will compile the dev branch on the build server and send a notification in case of failure.
The smart chaining multiple execution policy selected here will avoid launching unnecessary builds.
Let’s take an example: you have a build that lasts half an hour and 3 pushes are sent to the git repository at 5-minute intervals.
At the first push, the build is launched immediately.
At the 2nd push, a 2nd build is put on hold since the first one is not yet finished.
At the 3rd push, we don’t plan to do a 3rd build because the 2nd one is still on hold.
Creating the deployment task
To save time, create this task from the build task via Projects → CI/CD → Buid myawesomeapp / dev → Duplicate.
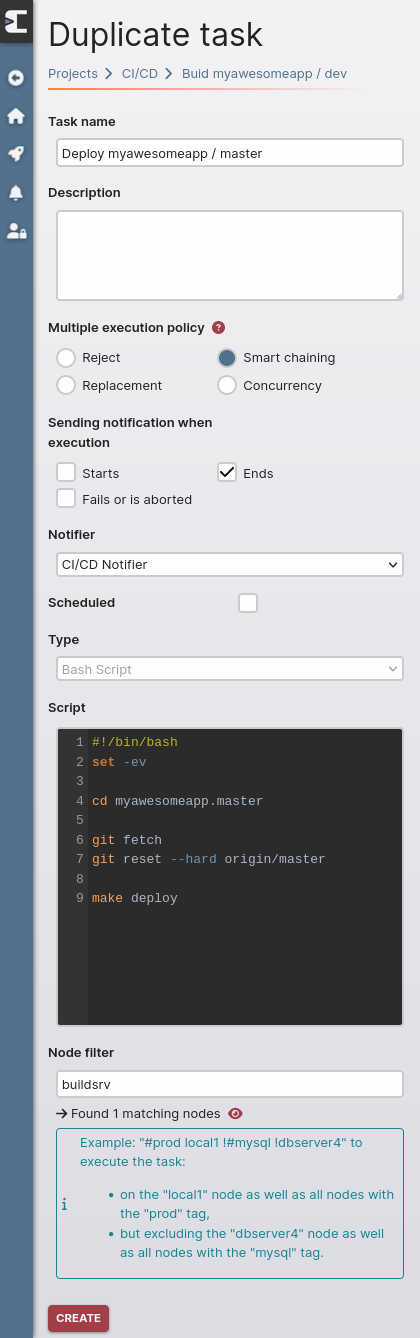
Making the following modifications:
- We want to receive a notification in case of success or failure.
- The script content is updated to deploy from the master branch.
Adding webhooks
Now that our build and deployment tasks are created, we will add an incoming webhook for each one that can be called by our git forge.
Let’s start with the deployment task by going to Projects → CI/CD → Buid myawesomeapp / dev → Incoming webhooks → New webhook.
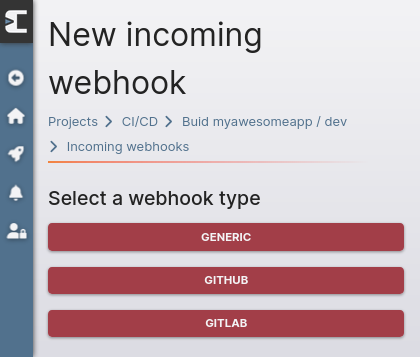
Choose GitHub as the webhook type.
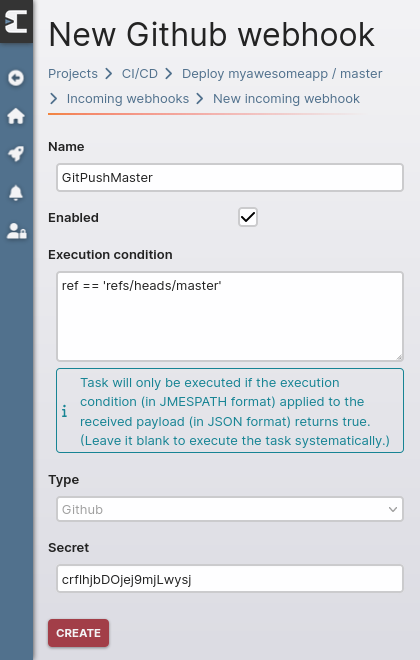
When GitHub calls our webhook following a push, it will do so regardless of the branch involved, but our task should only be executed when this push concerns the dev branch.
To solve this issue, we add an execution condition that will apply to the JSON payload sent by GitHub. The task will only be executed if the condition is met (i.e. the payload does indeed refer to the dev branch).
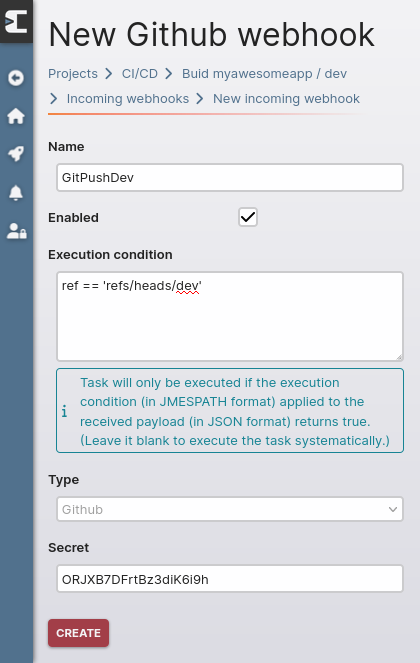
Define a secret if necessary, which will allow Ctfreak to validate that calls to the webhook come from GitHub, and validate.
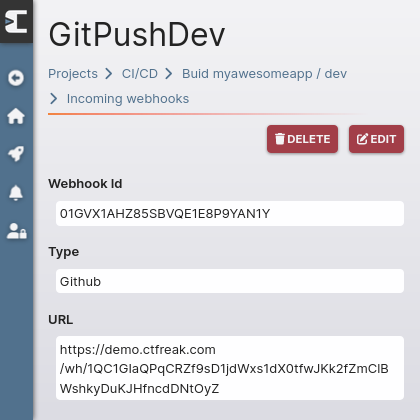
Once the webhook is created, we retrieve its URL for GitHub configuration.
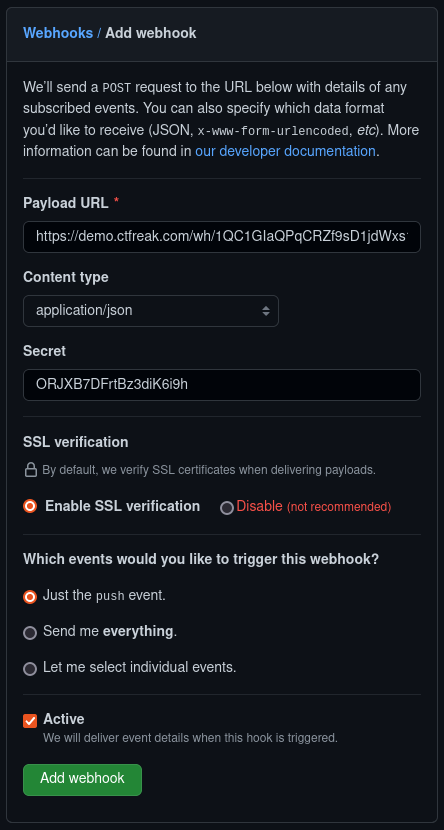
In your GitHub repository settings, add the webhook we just created, specifying:
- Its URL and secret
- That the expected format is JSON
- That the webhook should be called ONLY for push events
Proceed in the same way (create the webhook, reference it in GitHub) for the deployment task (be sure to reference the master branch in the execution condition):
Pipeline testing
Now that everything is set up, let’s see what happens when we do a git push on the dev branch:
After calling the GitPushDev webhook, the build task was executed successfully.

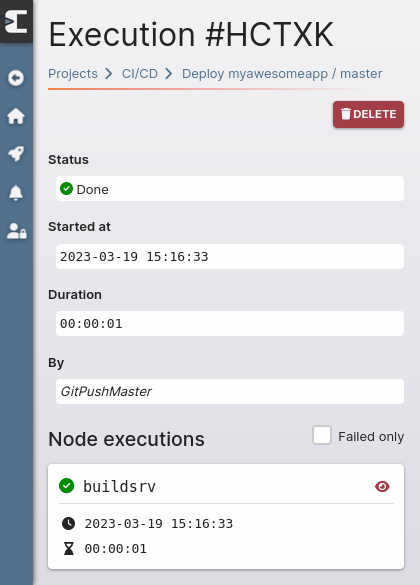
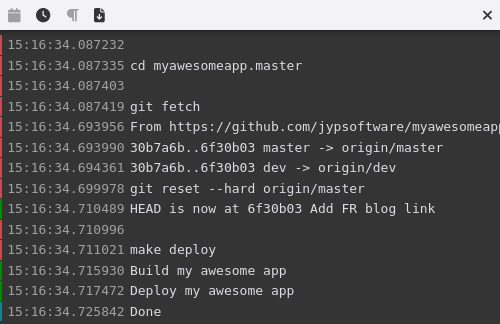
By clicking on the eye-shaped icon, we can see the execution logs.
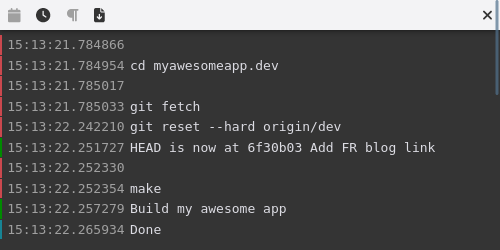
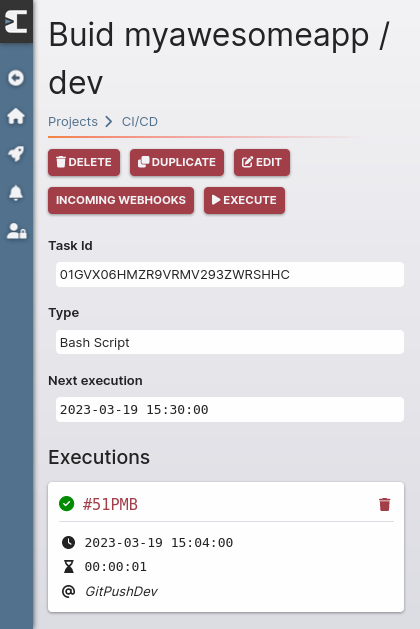
Let’s do the same test with a git push on the master branch:
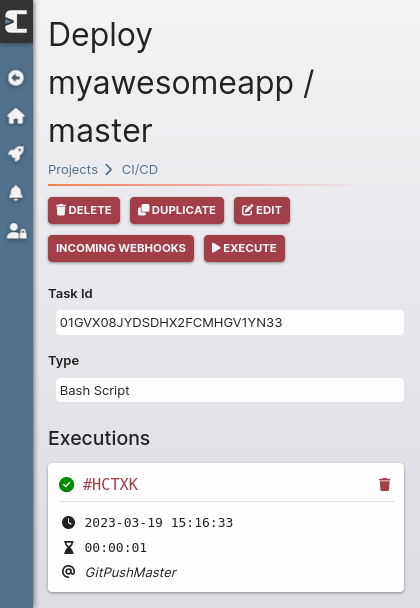
This time, the GitPushMaster webhook was called as expected.
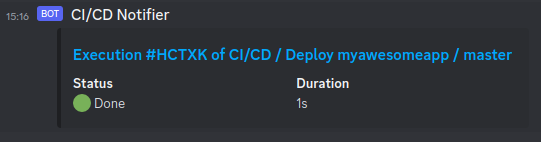
And the added bonus here is the receipt of a Discord notification confirming that the deployment was successful.
Conclusion
You now have an operational CI/CD pipeline that is flexible enough to handle even the most complex build workflows.
By opting for this self-hosted solution and placing the core of the build process in a shell script rather than in a continuous integration software like Jenkins, GitHub Actions, etc., you will benefit from several advantages:
- You will not be constrained by the limitations of the latter (older version of Git, certain specificities of your build not supported, limit of the number of daily builds reached, etc.).
- If your build server is unavailable, you can still perform an emergency deployment from a developer’s workstation (trust me, it can be useful).